| home | introduction | secondary cage | mirror box | truss | rocker box |
| how to make a truss dob |
|
part 5: The rocker box, the ground board, and the altitude wheels
The rocker box
For the combination of rocker box/ground board, there are in principle to possible combinations:
- The "flex rocker", consisting of a flimsy rocker and a very stable ground ring (see Mel Bartels' 20" Tridob)
- The conventional rocker, consisting of a very solid rocker box and a flimsy ground board.
Both combinations have their pros and cons. The flex rocker is more protruding, which, due to the broader base, may yield higher stability on the ground. The conventional combination has the advantage of being not as bulky, which makes it more compatible with an equatorial platform. As all my Dobs have use the conventional combination, I will put focus on this in the following.
|
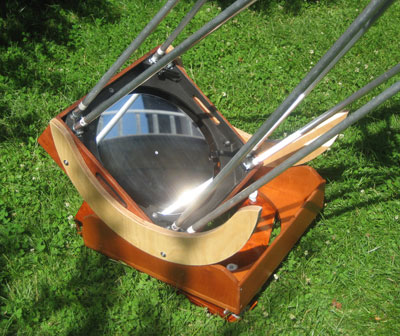
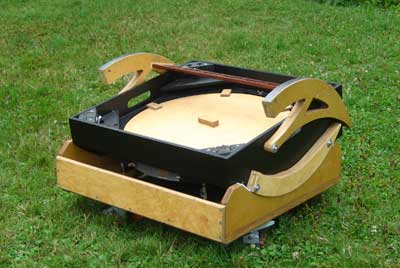
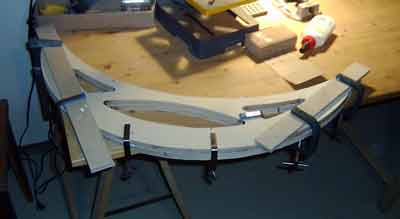
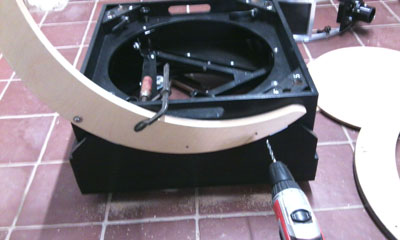
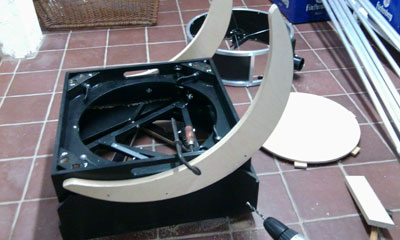
Even for a conventional rocker, there are further alternatives for the precise execution. The rocker box can be made in a closed way, with a full bottom board. This is the conventional way for most solid tube Dobs and for use with a central bolt for the azimuth bearing. For a large truss Dob, it is better to have an "open" rocker box, as for instance that of Stathis Kafalis' 24" Dob. This has several advantages: it saves weight, there is more space for slewing of the mirror box (the mirror's edge may even dive into the cutout), the ground board is easier to make, and combination with an equatorial platform is more easily accomplished. The bottom of the rocker box is the part that has to be the most stable as forces need to be transmitted from the four pads of the altitude bearing to the three pads of the ground board. This can be accomplished by massive wood or by using a sandwich composite of foam and wood, which combines thickness and hence stability with low weight. Furthermore, the rocker box should be a "box", with boards at the front and back side, as this will improve the statics substantially. Minimalistic rocker boxes, for instance with a round bottom board and without front and back side boards, may look very nice and light, but they do not have the full potential and stiffness of a true "box". |
|
|
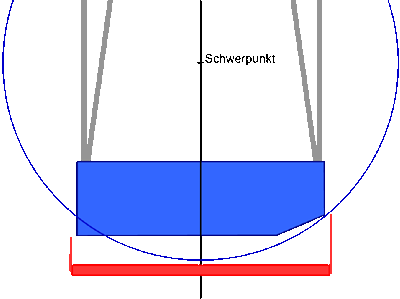
Planning of the rocker box is best achieved with construction plans. I proceed as detailed in the following: As a first step, I draw the mirror box (here blue) and the center of mass of the entire tube assembly. The position of the center of gravity can be determined best by balancing the complete tube over a broom stick. Alternatively, you can calculate its position, as detailed here. Then you take a compass and draw a circle around the center of mass. This circle should be large enough, such that the front corner of the mirror box (right side in the drawing) is completely inside the circle. This circle defines the space needed for slewing of the mirror box in altitude. It becomes immediately evident, why cutting off the front bottom corner of the mirror box is of advantage. The bottom of the rocker box should be drawn just below the lowest point of the circle. With this drawing, you can also determine the maximum height of the front and back side board of the rocker box. |
 |
|
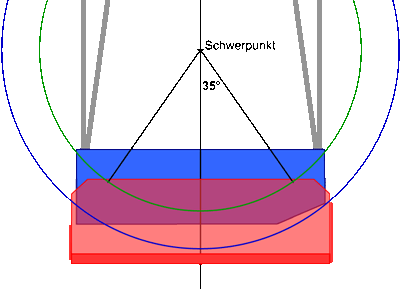
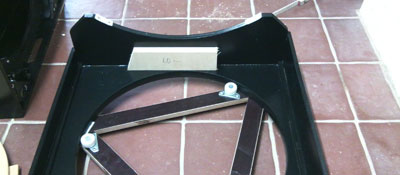
In the next step, I determine a useful diameter of the altitude bearings (green circle). The center of this circle coincides of course again with the center of gravity of the tube assembly. The diameter of the altitude bearings should be chosen such that the bearings can be attached solidly to the mirror box, but should simultaneously not become excessively large (at least not for a large Dob, as this will add stiction). As a rule of thumb, the teflon pads of the altitude bearings can be positioned at angles of 35° from the center of mass. For smaller angles, the bearings will have less friction, for larger ones more. 35° are a good compromise between ease of movements and stability. Now all dimensions of the rocker box are determined. You still need to cut out the circle sector for the altitude bearings and also the upper corners can be beveled. Richard Berry and David Kriege mention 1 cm2 per kg weight to be the optimal size of the teflon pads. In the case of the altitude bearing, this must be divided by four (as there are four pads) and in the case of the ground board by three. For me, this rule yields good results. |
 |
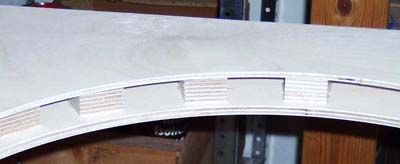
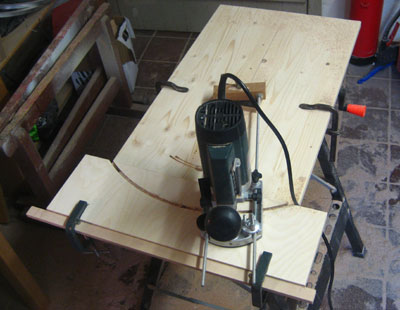
| When making the sides of the rocker box, mounting the router on a board is helpful. The plywood pieces of the sides can be fixed on the board. |
 |
Altitude wheels
| The altitude wheels should be made
only after completion of the entire tube and after determining the precise
location of its center of mass.
I have made altitude wheels both of plywood and of bent aluminum tubing. Plywood wheels are a bit stiffer. |
|
|
If you would like to leave the altitude wheels permanently attached to the mirror box, you can make them foldable, which will allow for easier transport in a car. |
|
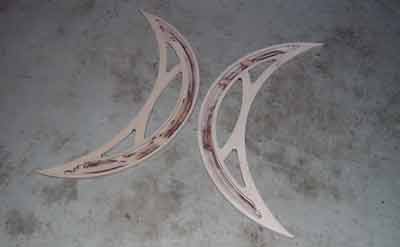
Making the altitude wheels
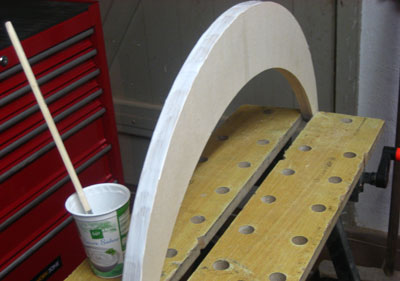
| For making crescent shaped altitude wheels, a router with compass and a long milling bit is very helpful. The crescents are here cut out of 21 mm plywood. It is better to do this in several passes, each time cutting 5 mm deeper. | 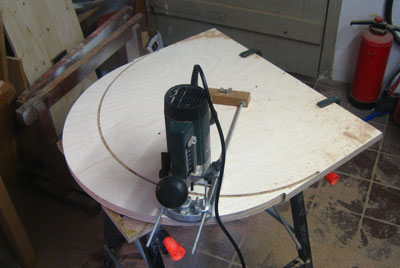 |
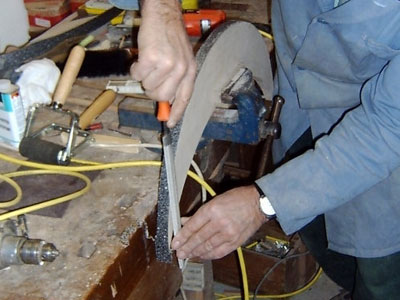
| The EbonyStar laminate can be glued
with contact cement or with regular wood glue, of which I prefer the latter.
The wood glue is best applied with a brush. |
 |
| The laminate material is pressed onto the wood by using lashing straps to achieve consistent pressure. | 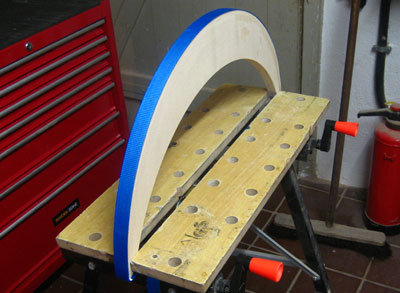 |
| The laminate is trimmed by a file or a rasp and then the edges are sanded. | 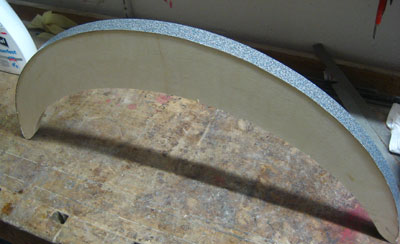
|
| For larger Dobs, the altitude wheels can become quite heavy. It may hence be useful to make them of two hollow halves, that are milled out using a router. |
|
Mounting the altitude wheels
| Mounting the altitude wheels at the
right position easily ends in a disaster. There are a few simple tricks to
make life easier. Importantly, the altitude wheels are attached to the
mirror box at the very end of the building process.
The first thing is to determine the distance between lower edge of the mirror box and the floor of the rocker box. Here you can find out how to do this. |
 |
| Next, you prepare wooden blocks to serve as spacers that you lay into the rocker box. Then the mirror box is put onto the blocks and is aligned within the rocker box. Et voilà, everything is in the right position. d | 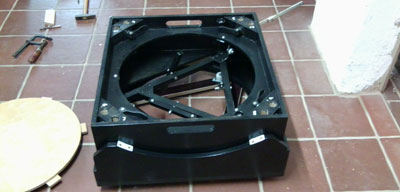 |
| In the next step, you clamp one of the altitude wheels to the mirror box and find suitable points for bolts (better three than two). You mark the positions of the bolting holes on the altitude wheel and drill the holes. You can put both wheels on top of each other and drill the holes in both in one step, making sure they are at the same position in both wheels. | 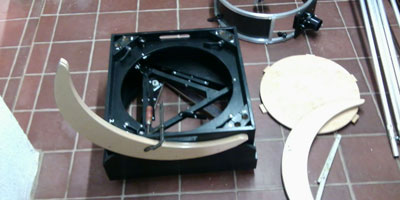 |
| Then you clamp one of the wheels
again to the mirror box and bore the holes through into the mirror box. Take
care that the holes don't get messed up inside the mirror box.
Then you widen the holes inside the mirror box for eventual captive nuts, drive them into the holes and bolt the first wheel to the mirror box. |
 |
| Now you can remove the spacer block
under the side of the mounted wheel, making sure that the wheel sits on this
side freely on the teflon pads.
Then you repeat the whole game on the other side. With this method, you make sure that the wheels are at the right position, that the holes on wheels and box are matching, and that both altitude wheels are flush in the teflon bearings. |
|
The ground board
|
The function of the ground board is to keep the teflon pads in position and to transmit the forces from the pads directly into the ground. Hence, the ground board can be very minimalistic. The rollers on top of the ground board engage into the central opening of the rocker box and prevent the rocker box from sliding off the ground board. The may (and should) have play. The teflon pads should be positioned as far outwards as is compatible with the rocker box. This will ensure that the rocker box will transmit forces via those parts, that are the most stable (close to the side walls). This again adds stiffness to the entire telescope. |
|
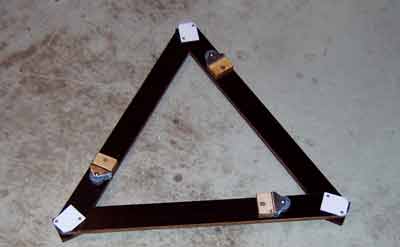
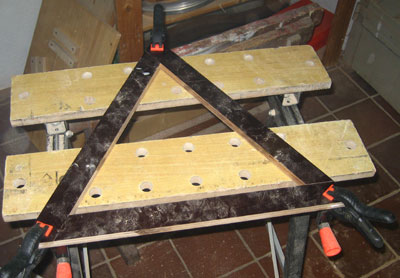
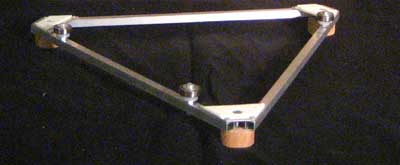
| The triangle is made from three pieces of plywood. The ends are trimmed on a buzz saw and glued together. | 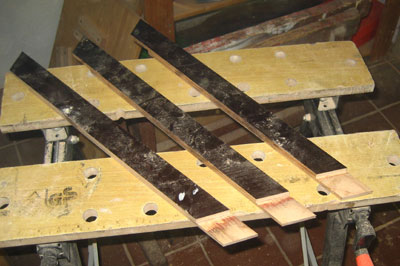
|
|
Bearing Material I use Ebony Star laminate as counterpart to Teflon. There are several types offered in Germany, a fine and a coarser one (the original). The coarse one is somewhat better in terms of ease of movements. Ebony Star can be cemented onto the wood surface using contact cement or be glued with wood glue (requires pressing). I prefer the latter. There are some alternatives to Ebony Star for the altitude bearings, such as structured aluminum sheets or nylon webbing. I have used all of them and had the best results with Ebony Star. |
|
Estimating eyepiece height
As a rough estimate during planning, the distance between bottom of the mirror box and ground is around 20 cm for Dobsonians between 16 and 24". This rule of thumb will allow you to estimate the eyepiece height already during the early stages of planning.
|
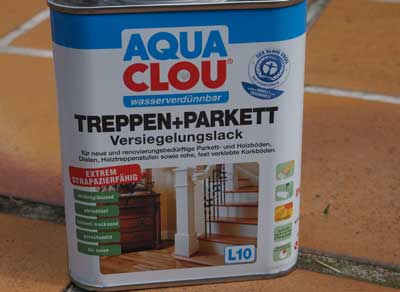
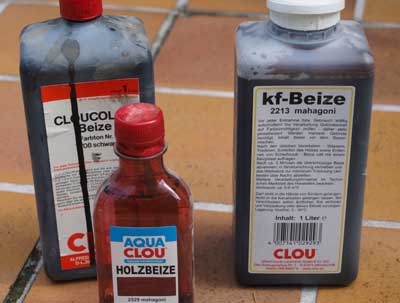
Finish For finishing the wooden surfaces, I have used oil, wax and varnish. In the meanwhile, I use first a stain to color the wood. These stains preserve the structure of the wood. |
 |
|
Then I apply three layers of a water
based floor lacquer. This lacquer is easy to use, gives a nice surface,
dries fast and allows for easy cleaning of brushes or lacquer drum.
The inner parts are painted with black dispersion paint and then finished with the same floor lacquer. Alternatively, a black stain is also suitable. The lacquer seals everything and prevents formation of mold (yes, this may happen and it did happen to me). Small parts are blackened using black spray lacquer. |
|
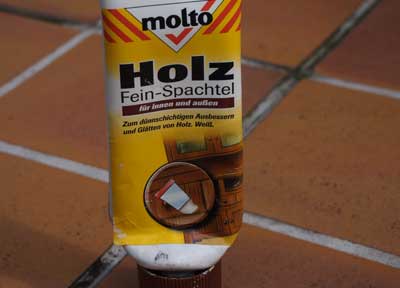
| To fix minor dentures, cracks, or holes in the wood, I use Molto wood filler. |
|
![]()
| home | introduction | secondary cage | mirror box | truss | rocker box |